First, we should cover why you should optimize images. Can you just drag it into your post editor and let the CMS figure it out?
I mean, sure.
But you shouldn’t.
First off, stock photos and raw graphics are huge. Check out the info on this simple download from Envato Elements:
First off, it’s over 4,000 pixels wide. The most common desktop browser width is 1,366 pixels. You could probably display this thing high res on a 55-inch monitor. That’s great, right?
Well, no.
Each pixel in an image contains information. And information adds weight. As a result, this image is almost 4 megabytes in size. That’s huge in image terms. And even if you’re asking your CMS to “shrink” it for you, it’s still serving up the entire 3.9 MB to the user.
That means a slow page, and unhappy users. (To say nothing of Google.) It’s even worse on mobile!
So yes, you need to optimize website images.
The first thing you need to do, obviously, is get your image. The most common sources are stock photo sites (like Envato and iStock). You can get free images on platforms like Unsplash. Or you can create your own images.
Whatever you do, don’t just grab something from Google Images. It’s almost certainly not licensed for you, and we’ve seen rights trolls hit companies with bills for thousands of dollars for unlicensed imagery. Pay a few bucks and resist the temptation.
Once you have your image, you’ll want to size it properly.
Most blog layouts are between 650 and 1,024 pixels wide. If you want a full-width image – quite common – use a screenshot app to highlight your entire column, like so:
This will tell you the column width in pixels.
If you want something smaller, you can choose just about anything. You typically can’t display an image wider than the content column itself.
Once you have an image size in mind, you’ll need to use software to shrink or crop it properly.
The most common software used to optimize images for blogs is Adobe Photoshop. It’s not cheap, but it’s the best of the bunch. (And it’s what we’ll be using in this tutorial.)
If you don’t want to invest in a Creative Cloud license to get Photoshop, you can also try free image sizing apps like:
(The process is basically the same in all of them.)
Steps for Blog Image Resizing in Photoshop
That’s it! Your image is now the right size.
Now it’s time to save your image.
I still like the old-fashioned “Save for Web” command in Photoshop. There are other ways, but this is fine for most basic use cases.
Steps for Saving Blog Images in Photoshop
That’s it! Your properly sized blog image is now in whatever folder you saved it to.
Your image is now properly sized and decent small. But there’s one last step to get it blog-ready: compression.
Compression removes as much file size as possible from images without compromising quality. An image saved from Photoshop is darn close to perfectly optimized, but this last step saves you precious page weight.
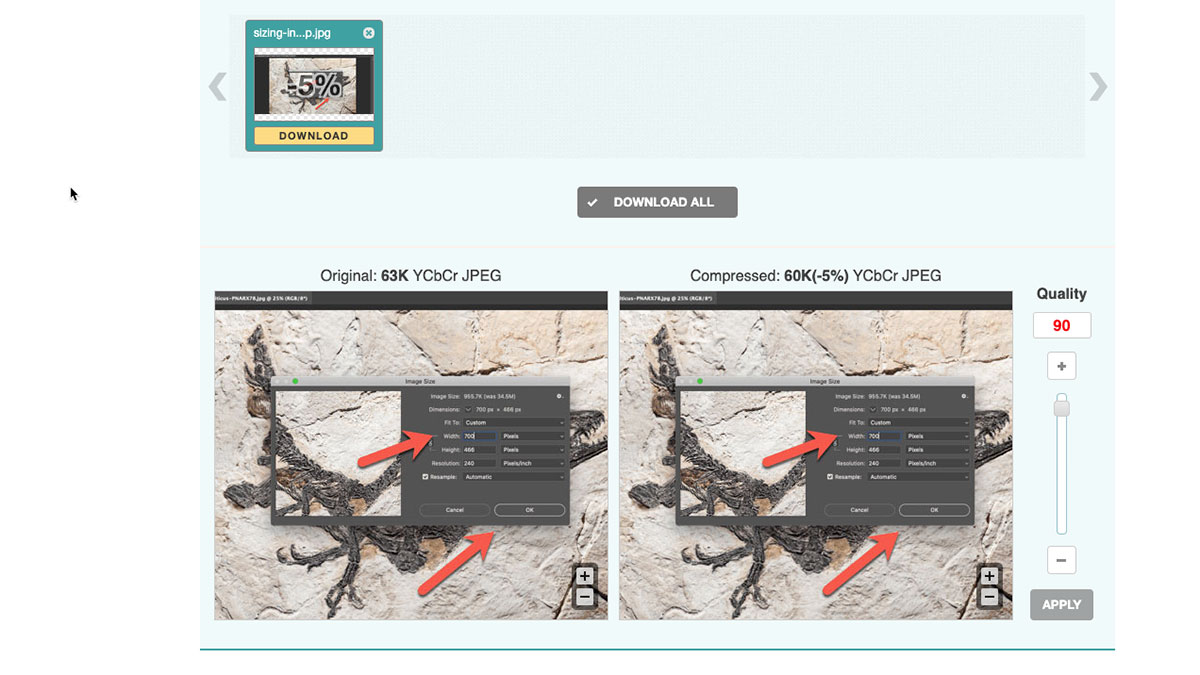
I like Optimizilla for quick online image compression. It’s fast and extremely easy. You just drag and drop your image, or pick it from an uploader. When it’s done, you download it.
You can see that that image was already pretty well optimized. Optimizilla only chopped 5% off it. But that’s still something!
Now that you’ve properly optimized an image for your blog, go ahead and post it! Your readers will thank you for not making them load a bunch of unnecessary data. And Google will reward you, too!
A good SEO strategy is table-stakes to stand out in any industry. But in the…
Market research is a crucial component when developing a successful marketing strategy in the manufacturing…
B2B marketers face a huge challenge: ensuring their messaging actually reaches the right audience. Companies…
No matter your industry, a vibrant and еngaging B2B blog is еssеntial for capturing the…
Email marketing plays a crucial role in the life sciences industry, serving as a powerful…
At the heart of any successful life sciences company’s strategy lies a keen understanding of…


