Here at Altitude, we’re unabashed fans of Unbounce. In fact, we often use the standalone landing page builder even when a client has a HubSpot subscription.
To properly integrate the two systems, you need to map your Unbounce forms to HubSpot fields. Here best practices for the integration, with step-by-step instructions, screenshots and examples.
(By the way, if you want to try Unbounce, you get a month free and 20% off your next three months if you sign up using this link. Consider it our gift to you.)
Step 1: Create Your Unbounce Landing Page
The first step in mapping Unbounce forms to HubSpot is creating your Unbounce landing page.
There are a slew of tutorials out there on this. The best are usually found on the Unbounce blog.
You can deploy Unbounce landing pages for pay-per-click campaigns, display campaigns, gated content, lead magnets and all sorts of other uses. We’ve even turned them into microsites and progressive web apps for events and conferences. The sky’s the limit.
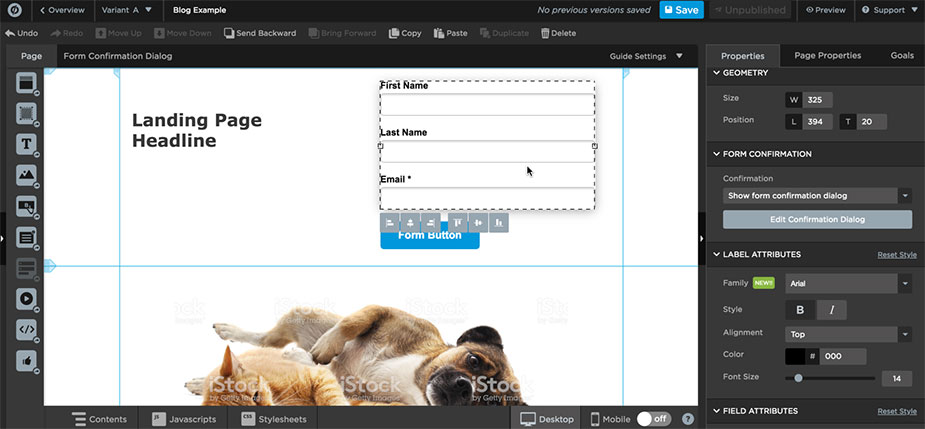
If you need to map user information from Unbounce to HubSpot, you’ll need to include a form on the landing page.
At a minimum, your form must ask for an email address for the data to be used to create a HubSpot contact. It’s usually best to ask for a user’s first name and last name, instead of their whole name. (Use a single “name” field if you’re advertising in Asia, South America or another region that often doesn’t use the North American first name-last name construct.)
Step 2: Create Your HubSpot Form
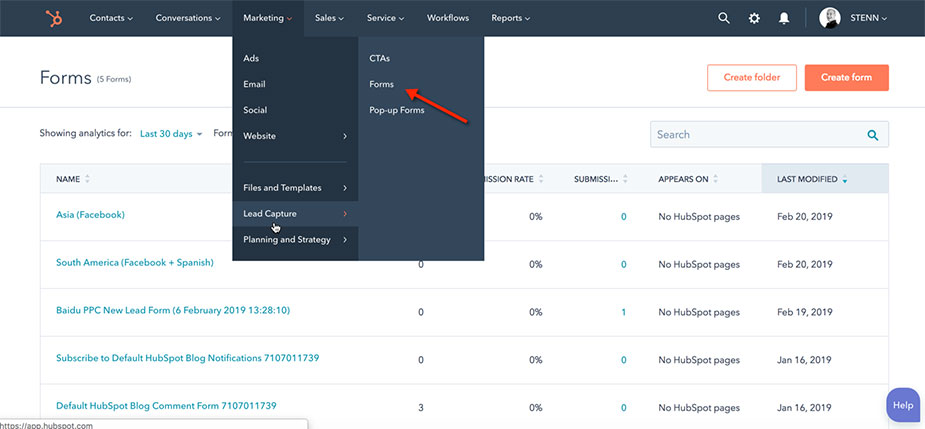
You’ll need a HubSpot form to collect the user data from Unbounce. To create this, navigate to Marketing >> Lead Capture >> Forms:
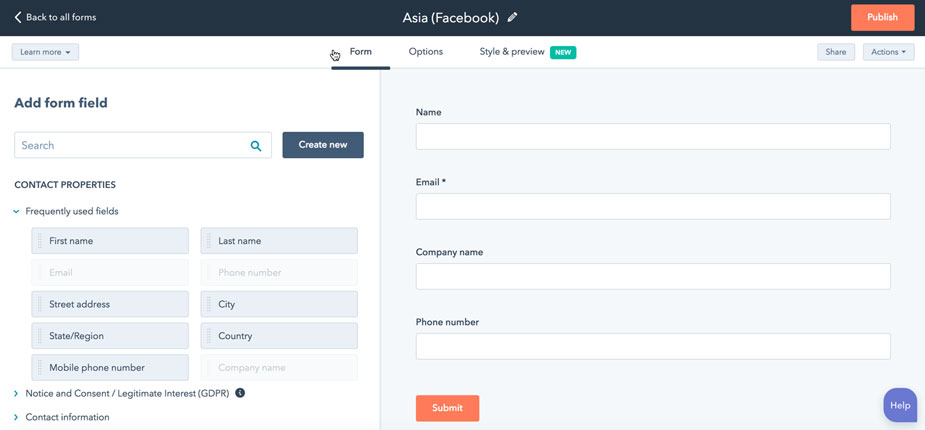
Then create a new form with fields that exactly match the fields in the form on your Unbounce page.
It’s best to make a new HubSpot form for each landing page. Make sure to keep the naming consistent. Otherwise, you’ll never be able to find your forms later.
Step 3: Integrate Unbounce with HubSpot
With your landing page built and your form ready in the marketing automation system, you’re ready to map your Unbounce form to HubSpot.
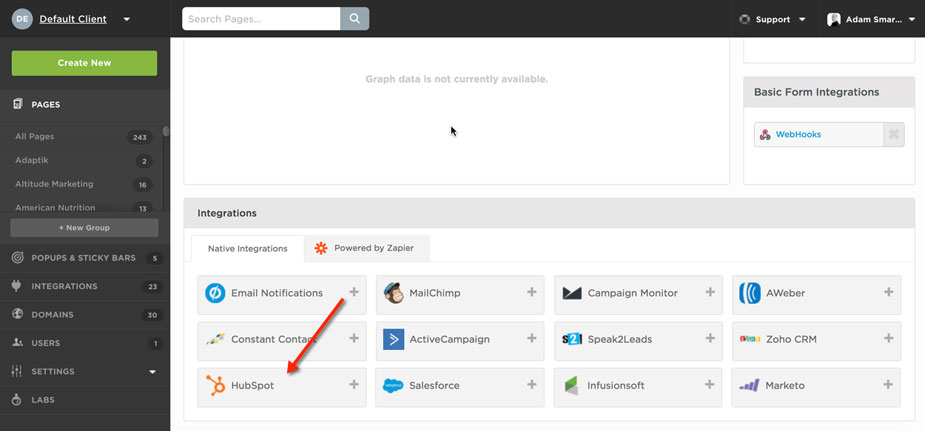
To do this, first click the HubSpot button under “Integrations” on your Unbounce page:
In the dialogue box that pops up, make sure your correct Hub ID is selected. You can find your Hub ID by clicking your company name at the top right of your HubSpot screen; it’s a seven-digit number.
After you confirm your Hub ID, pick the form you want to map your data to.
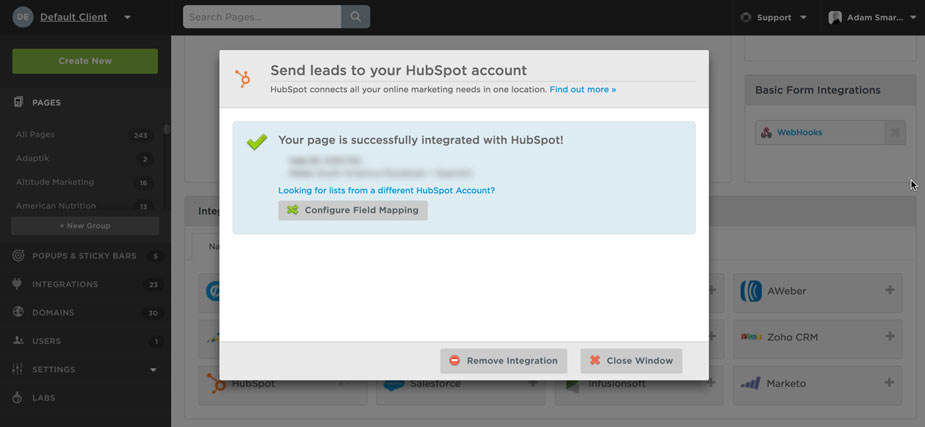
After you pick you form, you should see a success dialogue:
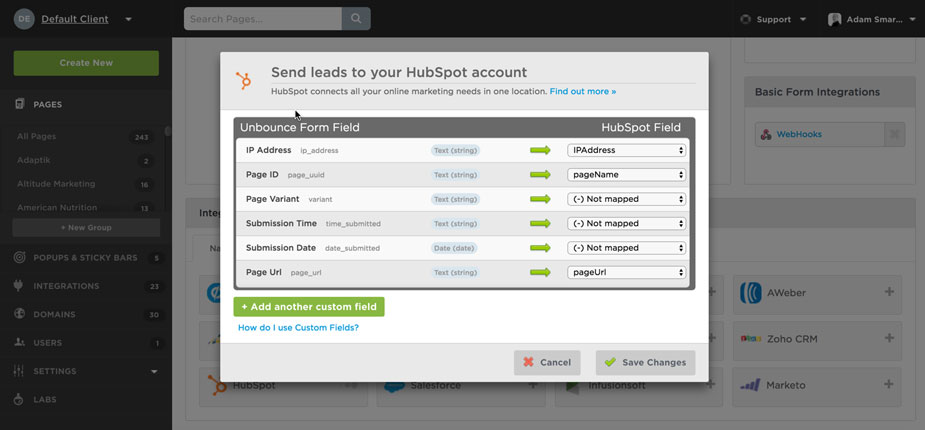
From here, click “Configure Field Mapping” to match your Unbounce form fields up with those in HubSpot.
This will let you send all manner of form data from Unbounce to HubSpot, including:
- Standard and custom form fields
- Metadata, like the user’s IP address, the landing page ID and variant
- Tracking data, like UTM codes
Step 4: Test Your Integration
Once you’re done with steps 1-3, access your landing page like a user and fill out the form using a unique fake email address and name. Then check that form in HubSpot.
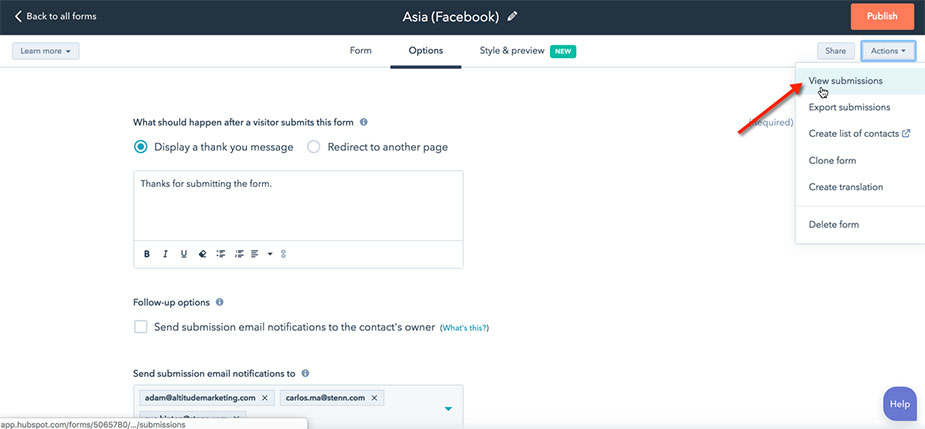
Go to Actions >> View Submissions and look for your newly created test contact:
If you see “yourself,” you’re good to go! But if it doesn’t appear after 15 minutes or so, something is broken. Go back to Step 2 and try to rebuild your integration.
If you still can’t get the data to flow through, it’s worth pinging Unbounce support. They’re pretty awesome.
Conclusion: Mapping Unbounce Forms to HubSpot
For our money, Unbounce is a superior landing page builder to even what’s available within even the best marketing automation platforms.
By learning to map your Unbounce forms to HubSpot, you’ll be able to enjoy the best of both worlds: a great landing page builder and all the workflow and automation capabilities of HubSpot.
Don’t have time to use Unbounce or HubSpot the way you’d like? We’d love to help. Our team of digital marketing experts includes experts on both platforms. Contact us online, or call 610-421-8601 x122 to get the ball rolling.

