Skip to content


Google Analytics is an amazing tool for marketers and anyone who runs a website. The app is powerful, thorough and – best of all – free. But if you don’t know how to set up Google Analytics the right way, you won’t be able to maximize its value.
In other words, before you start talking about website traffic, bounce rate, sources, mediums, behavior flow and all the other wonderful things you can access in Google Analytics, you need to make sure it’s configured correctly. Here are the steps you need to take to set up and customize Google Analytics in about half an hour.

Steps to Set Up Google Analytics in About 30 Minutes
- Create a Google Analytics Account
- Create a Google Tag Manager Account
- Create a Constant Variable
- Create the Google Analytics Tag
- Install Google Tag Manager on Your Website
- Set Up an IP Filter
- Link Google Analytics to Google Search Console
- Filter Bots and Spiders
- Activate Site Search Tracking
- Add Annotations
- Check Your Work
Why Use Google Analytics?
Most leads come from your website, so tracking SEO and user behavior there is incredibly important to make sure all of your marketing efforts are actually working. GA is a (free!) leading web analytics service that helps you analyze and visualize your audience as you guide them through the customer journey.
It’s worth noting that Google Analytics works with any content management system. So whether you use WordPress, HubSpot, Joomla, Drupal or any other CMS, you should be in good shape.
Side note: There are plugins that purport to do a lot of what we lay out in this blog post. It’s better to set up Google Analytics by hand. It’s easy and more future-proof than a WordPress plugin or third-party script.
You may have a GA account set up already, but if you don’t, it’s critical that you do set one up right away in order to capture the full analytics picture going forward.
Here are the steps to follow to make sure you properly set up and customize your Google Analytics account now. (They’ll save you headaches later).
Step 1: Create a Google Analytics Account
If you don’t have an account yet, you can easily create one here with your Gmail address or company email that uses Google Apps. Then, log in to your company’s Google Analytics account, go to the admin section, select “+ Create Account” and follow the instructions from there to add your company.
Step 2: Install the Tracking Script
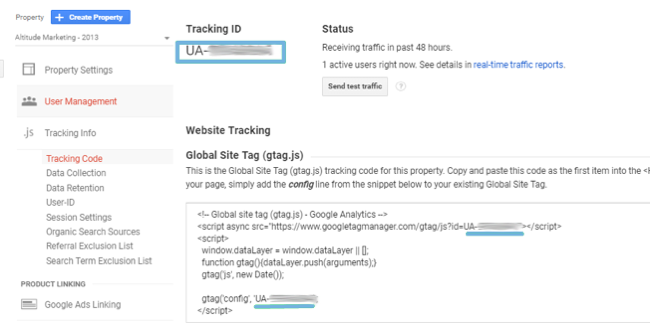
Before anything else, you need to grab the tracking script from GA. In your account, navigate like so: Admin>Property>Tracking Info>Tracking Code.
To actually install the tracking script, we recommend using Google Tag Manager.
Create a Google Tag Manager Account
Google Tag Manager allows you to easily add the GA tracking scripts to the website without the aid of a developer.
Login to your GTM account and create a new account.
Create a Constant Variable
To make setting up the main GA Tag in the next step (and other tags) in the future easy and error-free, create a constant variable that can be used instead of copying and pasting the ID every time it’s needed.
Navigate to the Variable tag: GTM>Select Client Account>Container>Variables.
Scroll down to the User-Defined Variables selection and select the “New” button. Name the variable “GA – Client ID#.”
As indicated in the screenshot, the ID String that will become your constant variable Tracking ID always starts with UA-. Paste this ID String into the Value bar.
Now, you have your ID that you can use to create the Google Analytics Tag.
Create the Google Analytics Tag
Navigate to the “tags” tab and click the “New” button. Name the tag “GA – Universal Analytics.” Select “edit” in the tag configuration block. Select the “Google Analytics – Universal Analytics” tag type from the list.
Set the following variables:
- Track Type = Page View
- Google Analytics Setting = New Variable = GA ID from the Tracking Code
- Add an “All Pages” trigger
Save, preview and publish tags.
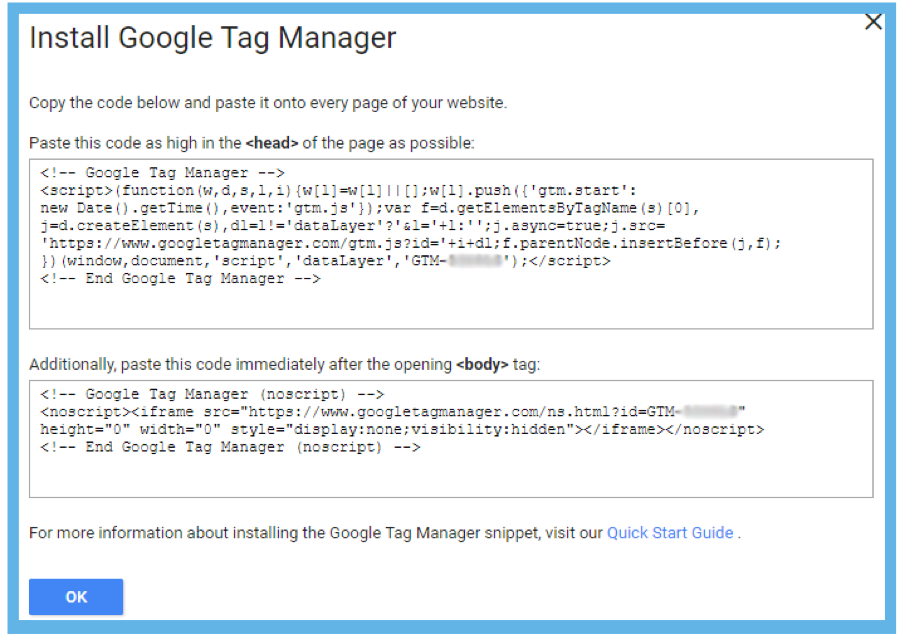
Where to Put Tag Manager Code on Your Website
Copy the top script for the header sections and the bottom script for the body sections. (Save these as text files on your local drive for future reference.)
Log in as an admin to your client’s website. We mostly use WordPress, so that’s what’s guiding our instructions here.
Navigate to Appearance>Editor. Go to the Header file. Copy and paste the Header script BEFORE the closing </head> tag. Next, add the Body script AFTER the <body> tag. Update the file and check the website to make sure everything is working and that the GTM container is deploying correctly.
After you complete this, you’re pretty much done with everything you need to set up Google Analytics. But why stop there? There’s more you can do to get the most out of your website analytics.
Step 3: Customize Your Google Analytics Account
Set Up an IP Filter
You only want to capture the website traffic that accurately reflects your marketing efforts, rather than your team and testing. We recommend setting a filter for your internal IP, so you’re only catching real, qualified traffic.
When you’re in GA, navigate like so: Admin>View>Filters. Create a new filer and select the following settings from the drop-downs: exclude logic, traffic from the IP addresses, and that are equal to.
Fun fact: you can do a simple Google Search to find out what your IP address is. Do this for you and your client and then paste them into the filter, separating them with a bar or “pipe”: |
Link Google Analytics to Google Search Console
Google Search Console is another Google product (duh) that can import data about your search results page appearances into Google Analytics. This helps make your GA a one stop shop to both monitor your onsite metrics as well as your performance before they even get to your website.
One of our favorite reports from this integration is the landing page report – particularly, which organic landing pages result in the most conversions.
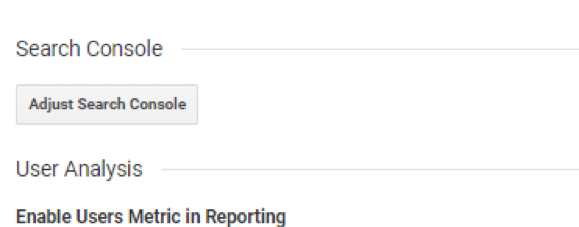
Where to do this: Admin>Property>Property Settings>Adjust Search Console
This window allows you to link to any Search Console account that you have access to with your Gmail address. Once you follow the wizard and select your Search Console account, the data will start populating in your GA Search console section going forward: Acquisition>Search Console>Landing Pages.
Filter Bots and Spiders
Just like internal IP traffic, you want to block any bots and spiders from skewing your analytics. In GA, go to: Admin>View Settings>Bot Filtering Checkbox. Simply check the box “bot filtering” to exclude all hits from known bots and spiders.

Activate Site Search Tracking
This allows you to track what is searched for on the website. GA>Admin>View Settings>Site Search Settings. Activate the Site Search Tracking toggle. Go to your website and perform a test search. Inspect the URL string for the search parameter, indicated in this screenshot:
Add the query parameter (it’s the thing after the question mark, usually “s” in WordPress) to GA.
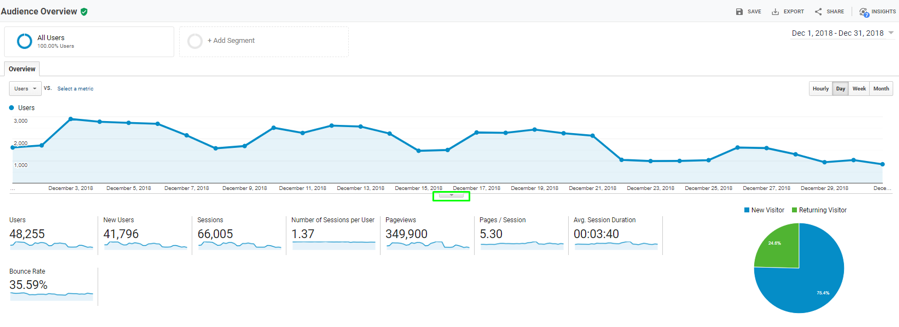
Add Annotations
When you start or end campaigns, distribute big press releases, make changes to the website and other major activities, you can annotate these changes on the Google Analytics timeline. This campaign tracking feature allows you to visualize a complete story of all of your progress.
You’ve Set Up Google Analytics!
There you have it. It should only take a few minutes to set up Google Analytics, and the tool should keep you in the know for years. Now it’s time to check your work, pick up some certifications in Google Analytics Academy and start analyzing your traffic like a pro. (You can even build snazzy dashboards in Google Data Studio.)
There are a lot of little moving parts when you set up Google Analytics, but by following these steps, you’ll be in great shape. That half-hour or so you spend to properly configure and customize your Google Analytics account will certainly be worth it in the end as you realize real results.
Need help setting up (and managing) Google Analytics and your website? We’ve got you covered. Altitude is a full-service B2B agency serving the website and digital marketing needs of clinets worldwide. Contact us online, or call 610-421-8601 x122.